You must be logged in as an administrator on the computer system to accomplish most of these tasks.
Let's check the network confguration. Open Control Panel and click on 'Network and Sharing Center'.

Click on 'Network and Sharing Center' (green arrow).
Inside the Network and Sharing Center, at upper left, you will see a little menu with a few items. Click on 'Change adapter settings'. If you do not see the 'Change adapter settings' item you have a much bigger problem and must stop here. You might want to attempt a system restore. Otherwise proceed as directed below.
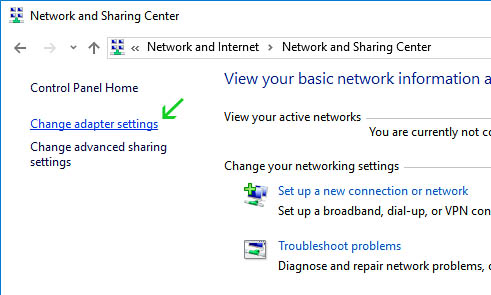
Click on 'Change adapter settings' (green arrow).
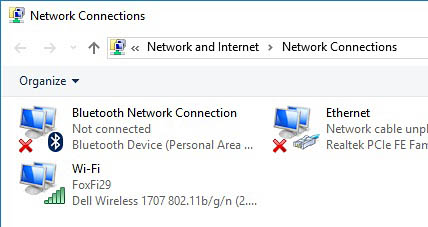
We are now in the Network Connections panel. In this example none of our devices have an active connection. We know this because of the red 'x' on each item. We want to get the Wi-Fi connected.
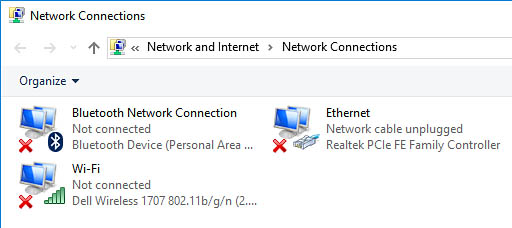
Our wifi connection has a red x. We do not have an active connection but the computer does see connections in range, indicated by the green bars.
Right click on the Wifi connection icon. You will get a little pop up menu. You shuld see the word 'Disable' (yellow arrow) at the top of the list. If you see the word 'Enable', click on it and enable the wifi connection. In this example our wifi is already enabled. Click on 'Properties' (green arrow).
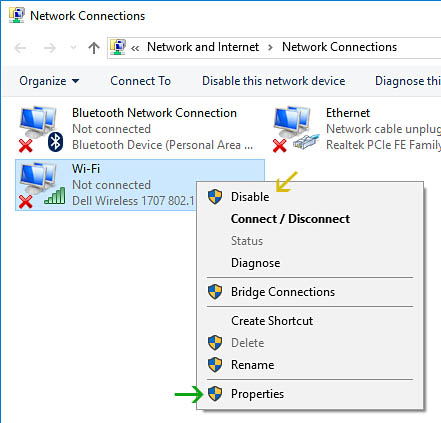
Click on 'Properties' (green arrow).
We are now presented with a pop up window for Wi-Fi properties. In the scroll box with the list of items, click on Internet protocol Version 4 (yellow arrow). It should appear blue when selected. Then click the Properties button (red arrow).
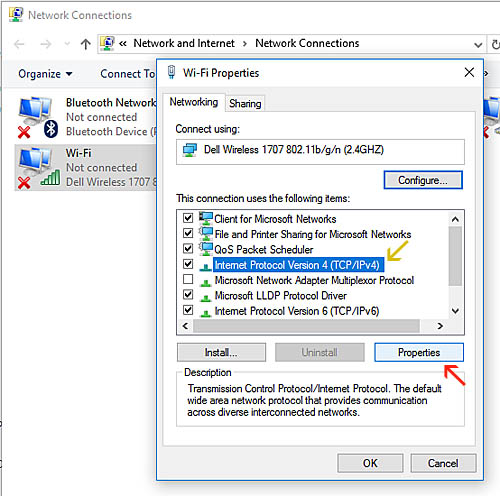
Click on Internet protocol Version 4 (yellow arrow), then click the Properties button (red arrow).
We are now presented with another pop up window for TCP/IPv4 Properties. Wi-fi is usually best used with DHCP on a notebook. Your window should look just like this image. If your system is a stationary workstation however, it is possible you are set to static. However, you can use either DHCP or static on a workstation (if you cannot connect your workstation, follow this example, but write down your addressing information or take a screen shot before switching to DHCP/automatic). In this example we are using DHCP, both items should be checked to 'Obtain.. automatically' and there should not be any information in the ip address or DNS server input boxes. If your pop up looks like this, click the 'OK' button (red arrow).
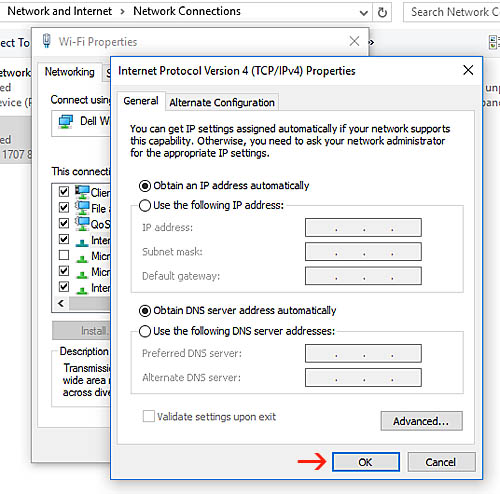
Check the 'Obtain automatically' radio buttons then click the 'OK' button (red arrow).
The example below shows how to switch to Google Public DNS. Do this if you think your router or Internet Service Provider might have an issue.
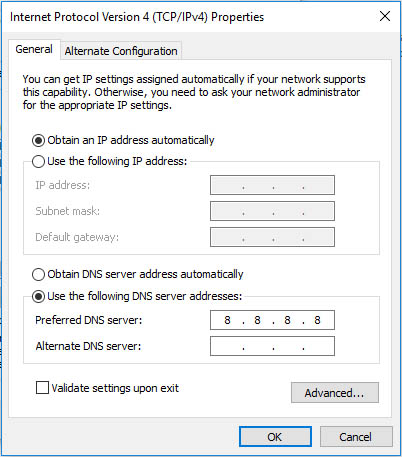
Type 8.8.8.8 in the 'Preferred DNS Server' input box to use Google Public DNS instead of your router's default ISP DNS. Then click 'OK'.
IPv6 is not usually used over the internet except in special situations. You can uncheck this unless you know you need it. The IPv6 used by certain local applications like database servers will still run on your machine.
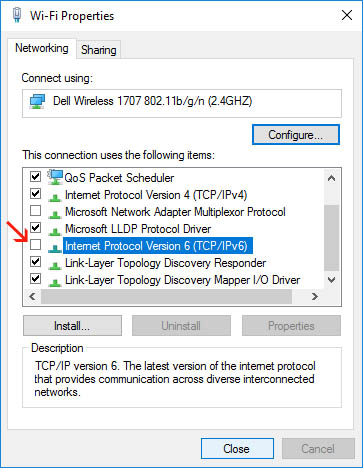
If you are not using IPV6 you can uncheck the box here.
Before you click the Close button, click the Sharing tab at the top of this box. Uncheck the Internet Connection Sharing box (red arrow) if it is checked. You can re-enable this later if you do need it but to get things running, uncheck it. It is generally unchecked by default. Then click 'Close'.
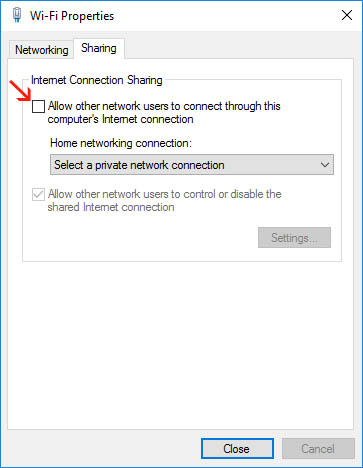
Uncheck the Internet Connection Sharing box (red arrow) if it is checked. Then click 'Close'.
You can minimize or close the control panel now. Lets return to the desktop.
At lower right, on the taskbar, is a wi-fi icon (yellow arrow). Click it. You should then see the Wi-fi connections pop up. Click the Wi-Fi box, if it is a grey color, to turn the wifi on (green arrow). If it is blue, it is already turned on. Don't click it or you'll turn the Wi-fi off.
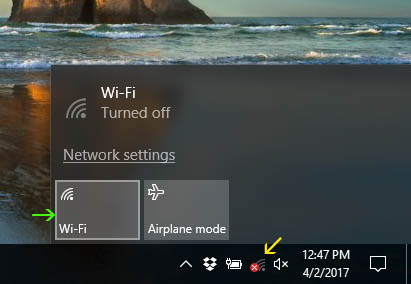
If the Wi-Fi box is a grey color, click it to turn the wifi on (green arrow).
In this example, our Wi-Fi is on but we still do not have a active connection. We can tell this because there is a tiny white dot at the 10 o'clock position above the wifi icon on the taskbar.
WiFi is on but we are not connected to the internet (yellow arrow).
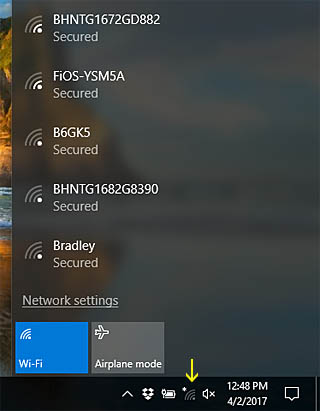
Select your connection from the Wi-Fi available connections list, then click Connect (yellow arrow). The wifi icon on the taskbar should not have a white dot at 10 o'clock when successfully connected (green arrow). You must have the password for the connection you are using unless it says 'unsecured' or 'open'. You may see more than one connection if you are in a public place or have neighbors nearby. You need to know which connection is yours. If you are in a restaurant you might need to ask the waitress which connection to use, or else just select one that says 'Open'.
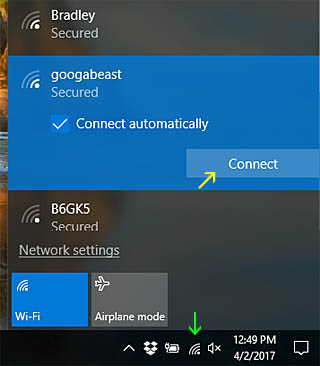
Click Connect (yellow arrow).
We tried connecting to googabeast but Windows says it can't connect (red arrow). We know that googabeast works for us. We think the password may have been changed recently. Click the Network settings link (green arrow).
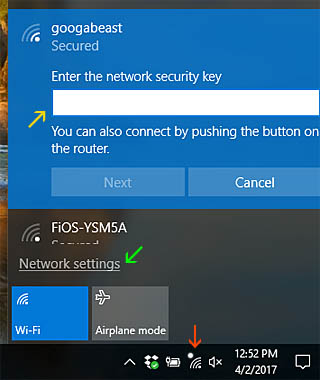
Click the Network settings link (green arrow).
Inside the Wi-Fi Settings for Windows 10, you will see a link that says 'Manage known networks'. Click that link (red arrow). There are other options inside this panel that might inteest you, note the other arrows.
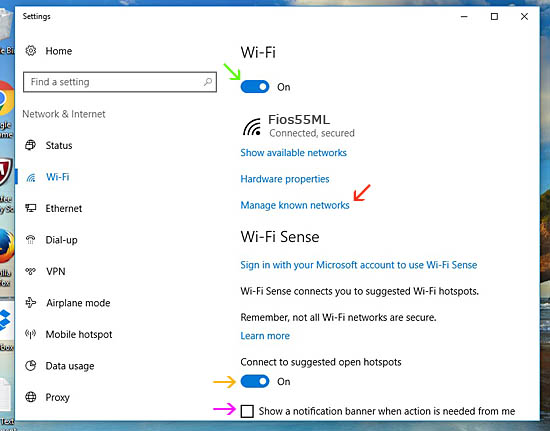
Click 'Manage known networks' (red arrow).
Because we suspect the password was changed, and we do have the new password, select the connection we are trying to use and then click 'Forget' (green arrow). If the computer forgets the connection information, it will ask for the new password next time we try to connect and that is what we want it to do.
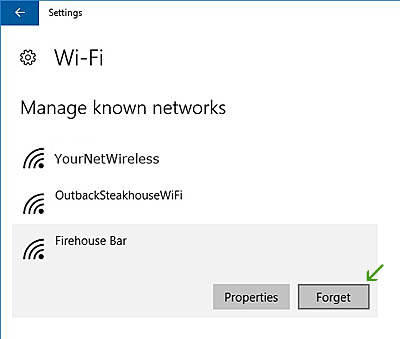
Click 'Forget' (green arrow).
At the desktop, try to connect again to the same connection after doing 'Forget'. Enter the new password when prompted.

Enter the new password (yellow arrow).
We should be connected now. Inside Control Panel we should not see a red x on the Wi-Fi connection anymore.
Outlook Issues
Running Outlook in safe mode often resolves issues. Always try this first when having issues with the Outlook 2016 or 2013 application. Older versions of Outlook are not compatible with Windows 10.
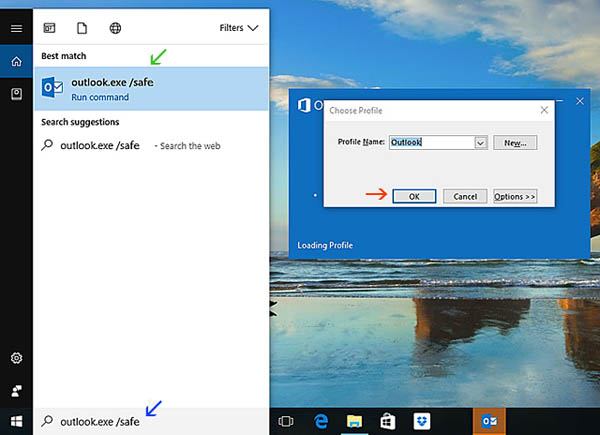
Run outlook.exe /safe